Using 2FA provides an effective means to secure your accounts from any unauthorised logins.
Before starting you will need to install an authenticator App on your chosen device.
For Android devices we recommend installing Google Authenticator
For Apple devices we also recommend installing Google Authenticator
For Windows phones you can install Authenticator+
Enabling 2FA
To enable 2FA the following steps must be done:
1. Login to your whm.pipe.co account
2. Click the top right menu “Your Name“, then click Security Settings
3. Click the green Click here to Enable button
4. Click the blue Get Started button
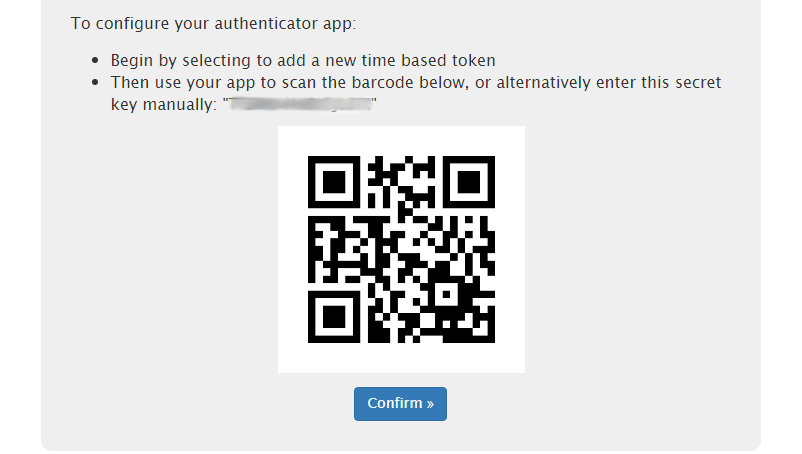
5. A time-based one-time password will be displayed in the form of a QR-code that can be scanned by your preferred authenticator app.
Alternatively to scanning, you can enter the Secret Key manually to set up 2FA

6. Click the blue Confirm button
7. Input the security code that has been generated by the authenticator app and click the blue Confirm button
8. A backup code will be generated, which you should write down and store in a safe place in the event of loss of your authentication device.
9. That’s it, 2FA will now be enabled so that each time you login you must use the time based authentication code generated by your authenticator app.
Disabling 2FA with access
While disabling 2FA is not recommended, the following steps can be followed to disable the service:
- Navigate to Security Settings from the “Hello, !” dropdown menu
- Press the Click here to Disable button
- Enter your whm.pipe.co password into the Enter Your Password box
That’s it, your 2FA will now be disabled.
Disabling 2FA without access
- Name two or more of the domains under the account or the one domain if you only have one domain
- The phone number registered on your account.
- The email address registered on your account.
- The postcode registered on your account.
- The last 4 digits of a payment card registered on your account.
- The name of another contact that might have been added to your account
- Any additional services added to your account
- The date of your last invoice with either its number or its value.
- Any previous ticket numbers and their titles.
- The approximate date that you joined Pipe Ten.

Classification: Public
Last saved: 2024/12/05 at 15:59 by Jamie
