This guide will help show you how to add email addresses to your white list or black list.
A white list can be used to ensure emails don’t get marked as spam from specified email addresses on the list. This ensures no legitimate emails from a particular email address end up going unseen due to the potential of it being moved/removed by the spam filter.
A black list does the opposite and ensures no emails from the email addresses specified on the list get through to your mailbox or the email’s intended destination. It’s usually best used when you have an email address prone to sending you lots of spam. You could add the address to the blacklist to stop receiving any emails from that email address.
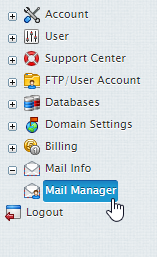
1. From your control panel, navigate to Mail Info > Mail Manager.

2. From the dropdown menu select the domain that holds your mailbox.

3. Select the Anti-Spam icon for the mailbox you wish to alter the whitelist / blacklist of.

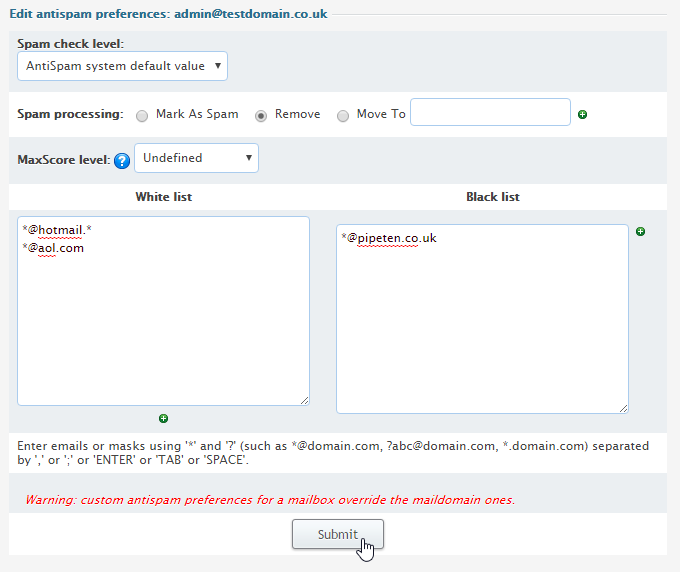
4. Within the White list and Black list enter the relevant emails you wish to approve/block and click Submit.

Multiple addresses can be seperated by using “,” or “;” or “ENTER” or “TAB” or “SPACE“.
You can also use masks ‘*’ or ‘?’ to block an entire domain if you wished, for example if I decided I no longer wanted emails from hotmail I could add a blacklist for *@hotmail.* this would block any of the following emails:
bob@hotmail.co.uk
alice@hotmail.com

Classification: Public
Last saved: 2021/11/11 at 14:16 by Jamie
