-
- Open Cyberduck and follow the connection procedures you would normally use
-
- Within the File Browser, select the file/folder you wish to alter permissions for. Once you have done so, proceed to click on the icon labelled Get Info in the toolbar.

-
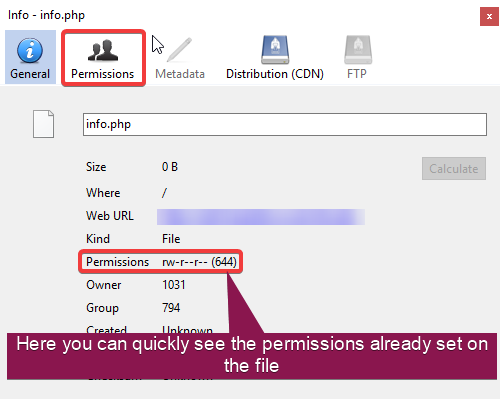
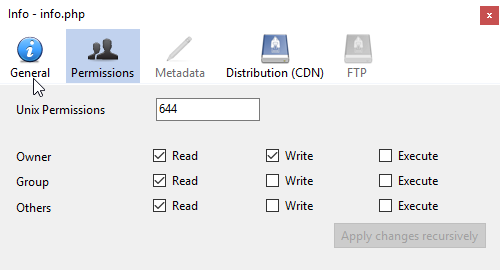
- After clicking on the Get info icon, you will be greeted by the Info Panel that has information listed corresponding to the file/folder you selected in the previous step. Upon opening this panel, there will be a navigation bar where will you see the Permission tab. Proceed to click on it if you wish to configure the file’s permissions.

-
- Using the checkboxes listed within the Permissions tab, you’re now able to allocate the permissions you wish to the chosen file/folder. These changes save automatically, so you can feel free to close the window upon confirming with yourself the permissions you want to apply. If you wish to apply the permissions recursively, simply click the labelled button to do so once your changes have been made. To double check the permissions have saved, view the information in the General tab via the Permissions listing, which can be seen displayed and labelled in the step above.


Classification: Public
Last saved: 2019/11/27 at 16:03 by Jamie
