Your hosting plan determines the services you get with the account and the prices for these services. Big sites with high hit rates and special services require more expensive plans; cheaper plans are suitable for simpler sites.
Note: When upgrading ensure you choose a plan ending in + as these are our most recent packages.
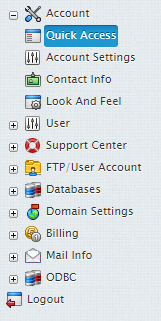
1. Navigate to Account > Quick Access.

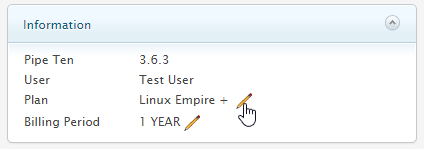
2. Select the Edit icon next to your current plan.

3. From the drop down menu select your new plan and click the Switch icon.
Note packages ending in “-” are our legacy packages, please ensure you choose a package ending in “+” to get the full quotas as seen on our main website.

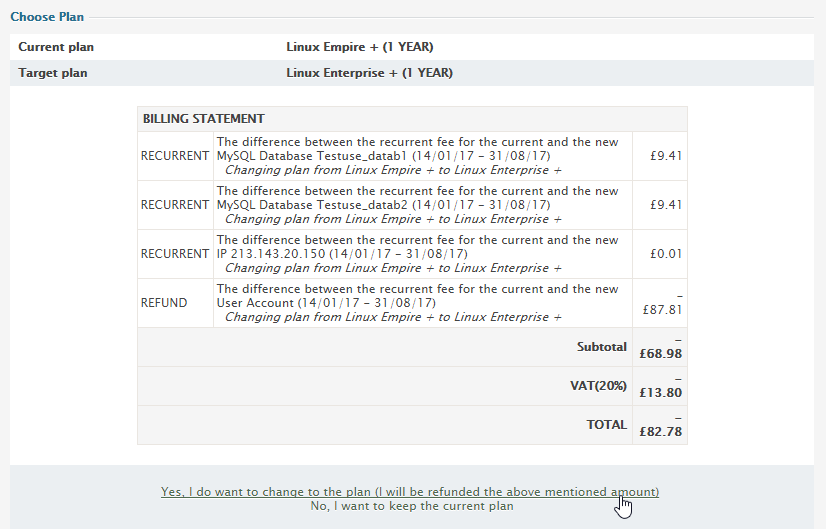
4. Confirm any charges or differences to the package

Warning: Switching plans will disable the resources that are unavailable under the plan you are switching to.
If you don’t see the plan of your choice in the list that appears, it means it is incompatible with your current plan. You can’t change to an incompatible plan, but you can create a new account under this plan and then, if you want, you can delete your old account.
- Plan Upgrade: If you are switching to a ‘higher’ plan, your disk quota doesn’t increase, but free units do. As a result, your disk quota may turn out to be lower than free units, so you can increase your disk quota without being charged. The same is true of other resources.
- Plan Downgrade: If you are switching to a ‘lower’ plan, the system reduces your quotas for free units. If you are using more than free units, the system reduces the quota to the amount you are using.

Classification: Public
Last saved: 2021/11/11 at 14:29 by Jamie
